Mr Blimp
We have a lot of helium here at the flat, a lot! As in two canisters worth. But anyway, I started my weekend by cleaning the garage and doing the washing, but by Saturday afternoon I was all done and had nothing to do. The thought of wasting an entire weekend without making something sent shivers through me, so for whatever reason I decided that I would make a cellphone controlled blimp. I suspect that decision probably had something to do with the package I'd just received from China, that contained a $6 bluetooth serial interface board. I was itching to use it!
A quick rummage around later and I found some spare LB1973M ICs, perfect for driving two small DC motors. Also in my DealExtreme package were a couple of mini solar toys which had some very small motors and gears, ideal for powering this thing.
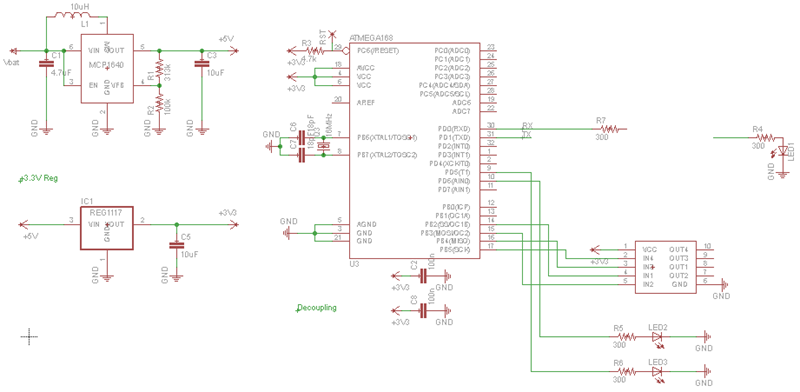
A few hours later and I'd designed my circuit:
Based around an Arduino, i.e. an ATMega168. The power comes from a small Li-ion battery cell stolen from a mini-camera module. An MCP1640 IC steps that up to 5V, and a linear regulator drops it back down to 3.3V. 3.3V is what the logic all runs at, and the battery pack puts out up to 4.2V, but this quickly drops as the charge is depleted. Since a linear regualtor has a 1.2V drop I can't run it straight from the battery. By first stepping it up to 5V I get around this and can use the battery until it is completely dischared. This is the same mechanism I use in my high altitude blimps.
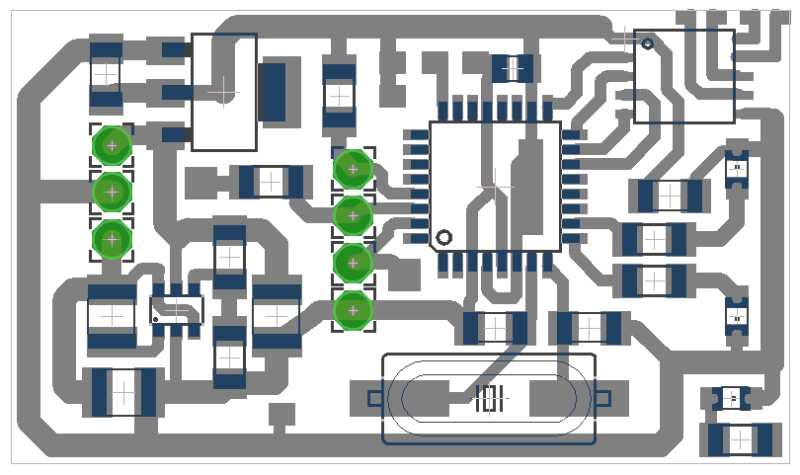
The rest is pretty simple. A bit of decoupling, a motor drive IC, some Blinkenlights, and we're about done. The PCB wasn't too hard to route:
Sunday's first job was to etch the PCB. Out came my fancy new "blue stick&peel" toner transfer paper and into the printer it went. An hour later and a partially dismantled laser printer later, it appears we don't have a tray 1 pickup roller on our printer. So out came the high temp cellotape to stick my small square of paper to a regular sheet, and through it went. Success!
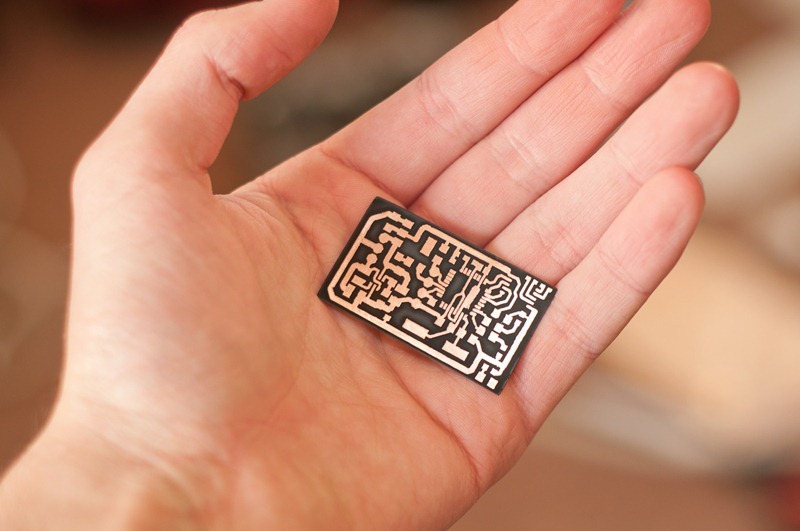
After etching (always a slow job) and removing the toner I was left with this:
My super-light-weight PCB material has a sexy black base which makes it look every more high tech.
I then found a semi-faulty ATMega168 module and flashed it with a new bootloader, before desoldering it with my gas pen-torch. A lot of flux and solder later and my PCB was complete.
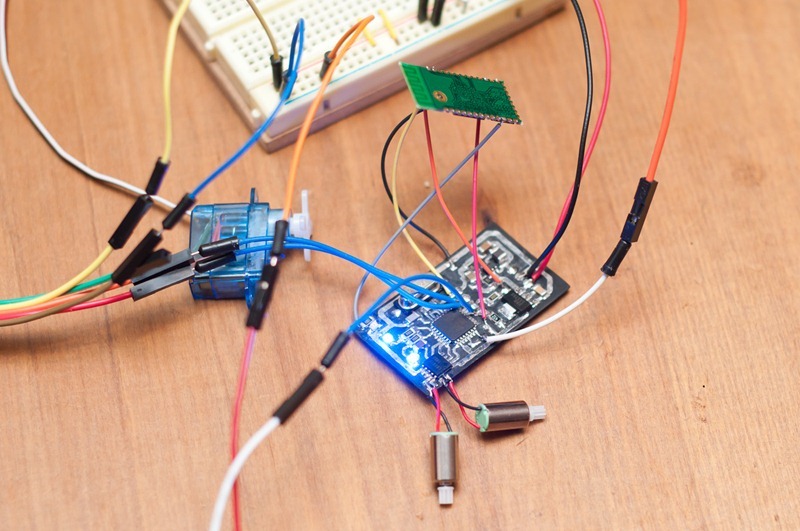
Then it was on to testing it. I wired up a reset switch, some programming lines, the bluetooth module, some power lines, a stepper and the two mini motors.
A few tests later and everything seemed operational. I set up the bluetooth link with my phone and added some really whacky controls through Amarino, an open source Android to Arduino system. It was very easy to set up and use, although documentation was a little sparse. In the end the in-app documentation and examples were the best bets.
After much thought I decided on the following controls:
- Tilt phone forward and back: speed of the motors, makes the blimp go forward or back.
- Rotate phone left or right: makes one motor spin faster than the other, causing blimp to rotate around.
- Twist phone right or left: adjusts the angle of the motors to give up or down thrust.
All seemed to work well. It was now Sunday night.
I spent most of Monday rigging up the motors and making a balsa frame for it. I wired in the motors and fixed a few faulty connections.
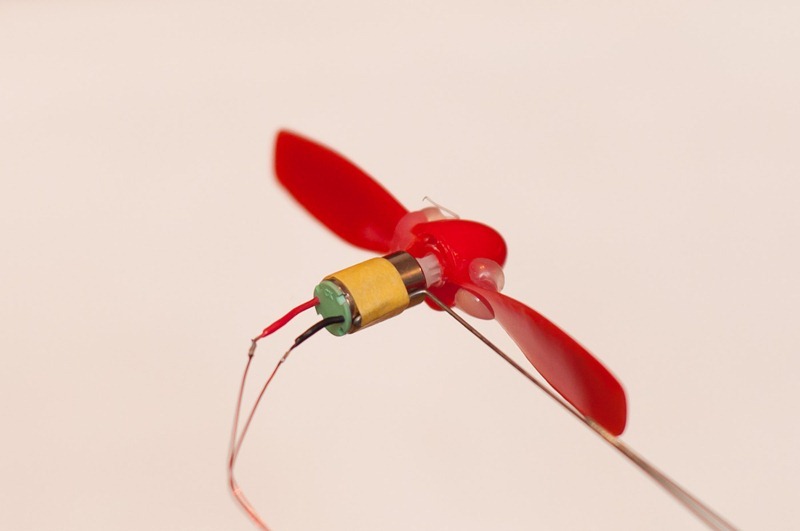
Here is one of the motors on a piano-wire outrigger. The props are from Rachel's dad and have obviously had a tough life judging by the hot glue! I drilled out the shaft till it would push fit onto the cogs on the motors.
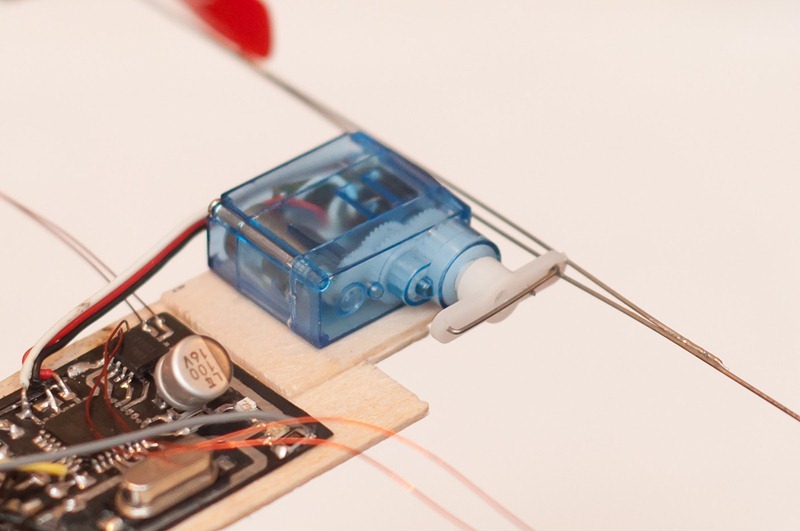
This is the servo that adjusts the pitch of the props. It weighs about 3 grams! you can see my little control mechanism made out of piano wire. Piano wire is incredibly strong and flexible wire that stays very straight and is very thin and hard to bend; ideal for holding my motors.
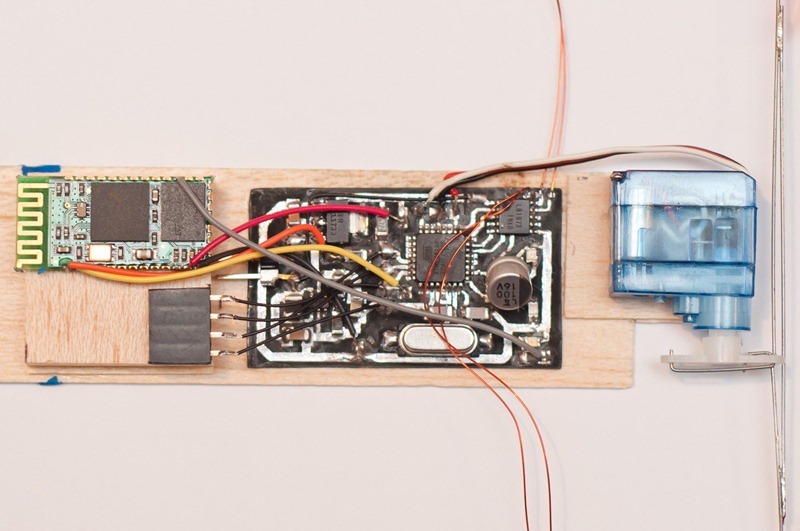
Here is the completed board. From left to right, Bluetooth module, programming header underneith, then the main circuit board, then the pitch servo.
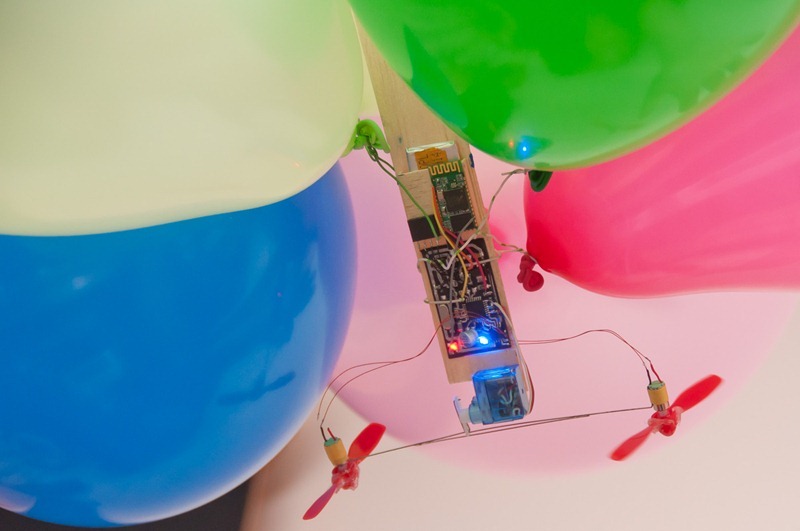
Then it was time for a flight test! Some balloons and helium were found, and sme wire to tie the balloons to the blimp. Then I discovered that it was quite a bit heavier than I was imagining. In the end it took 4 balloons to get it aloft, and some plasticine to balance the weight and achieve neutral boyancy. By the time I'd ironed out the bugs and recharged the battery a few times (it only gives a 3 minute journey!) enough helium had leaked out that I needed more balloons.
So here it is sailing around the living room with five balloons!
The cat was pretty spooked, and the controls are very unintuitive. However with much care it is possible to make it drift around the room and crash into various things. And then just as you get the hang of it, the battery goes flat again!
To celebrate Sammi and I made a bit of a video. Behold our fantatic efforts: http://www.youtube.com/watch?v=prPgA9iHkf0
All in all a fun project, although I discovered that others have made 3 gram blimps that only need a single balloon, however I'm not willing to throw $50 at this for extra lightweight propellors that weigh 0.05g or motors that weigh just 0.65g. So for a quick and dirty hack this has proven pretty fun, and I've mastered a few new technologies. Maybe my next project will be a cellphone-controlled racing car? I have lots of wheels, and big batteries, and a circuit for driving a pair of motors…


Comments
Leave a comment?