
A 3D printer - part 1
Now that one machine is working well, it's time to make another. While idly browsing the wide wide world of web recently, I came across the Printrbot Simple, which is a remarkably simple and compact 3D printer. Now I've wanted a 3d printer for some time, however they have always required a lot of components, many of them specialised and difficult to get a hold of.
The Printrbot Simple however uses laser cut wood for the bulk of it, and nothing too complex for the rest.
So after studying it for a while, I set about making one.
A 3d printer is a printer that extrudes melted plastic to build up solid objects, layer by layer. The quality is acceptable, although not nearly good enough for model making. However a 3d printer really shines through for fabricating components for other machines: brackets, mounts, supports, etc. Items that would require lots of tedious measuring, cutting, drilling, milling, sawing, glueing, and so forth can instead be quickly designed on the computer and then printed out, ready to be used. The parts are accurate and repeatable, which makes it great for rapidly producing all sorts of items.
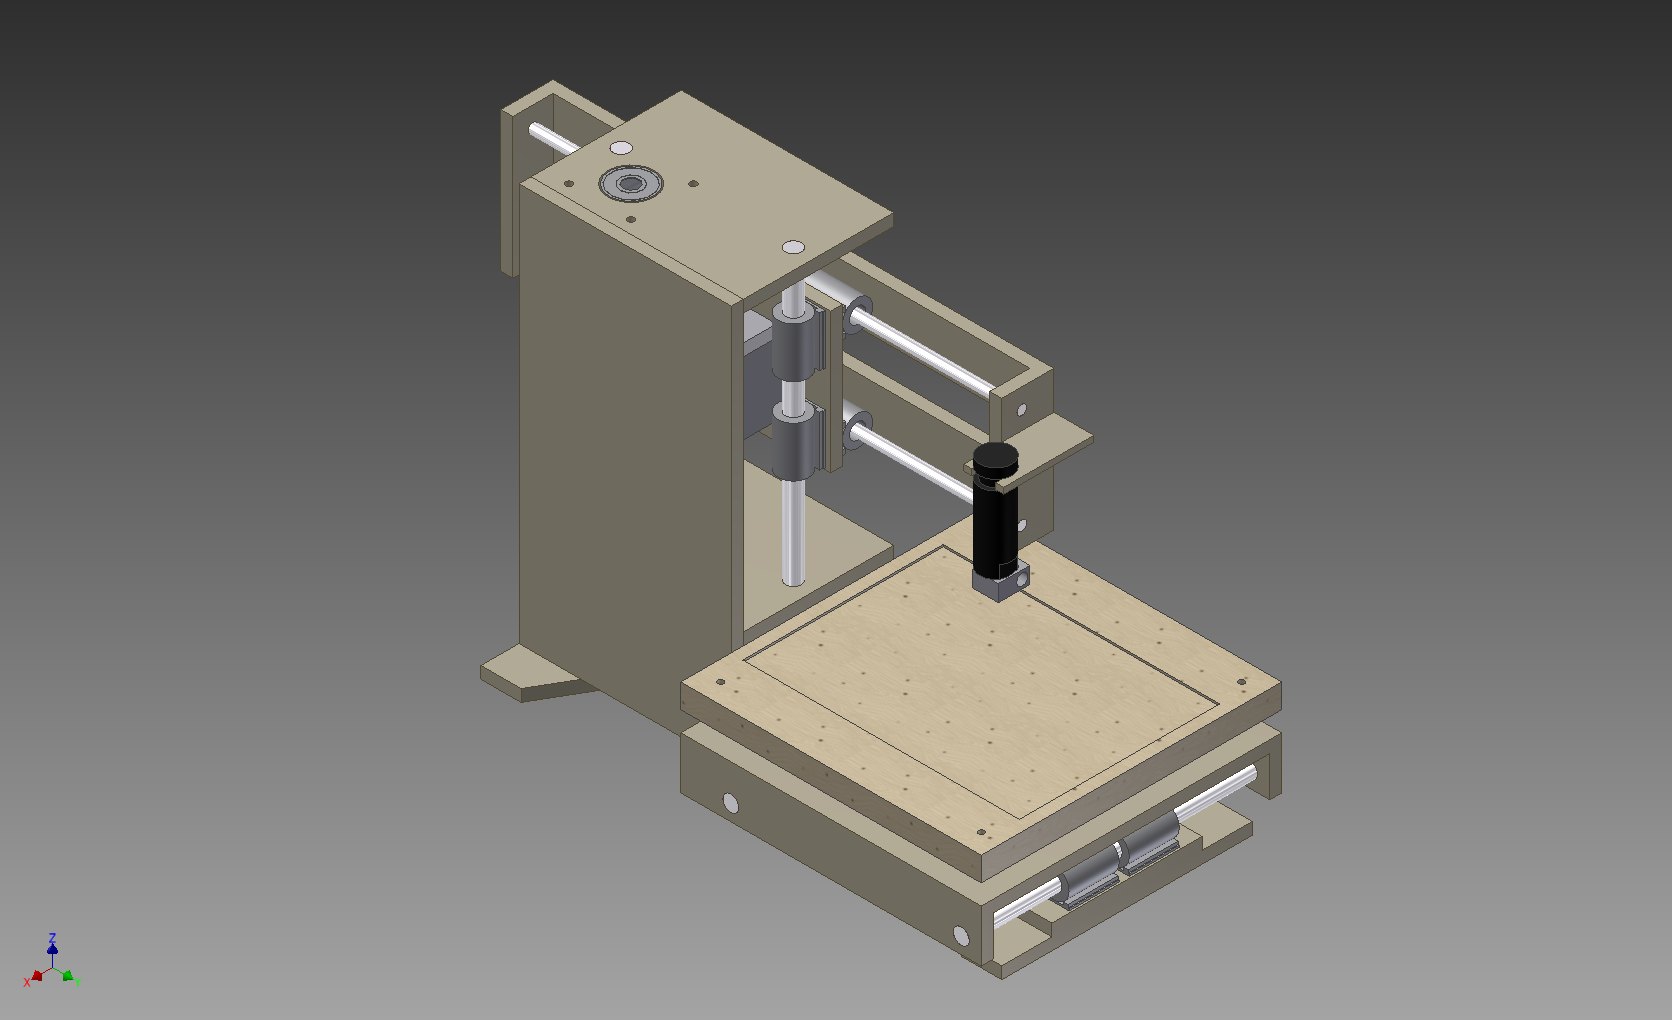
I started off by making a complete model of the printer in Autodesk Inventor, a 3D solid modeling program. By virtually building it I was able to verify that everything lined up, clearances were ok, whether I would have enough material, and what size objects I'd be able to produce when done.

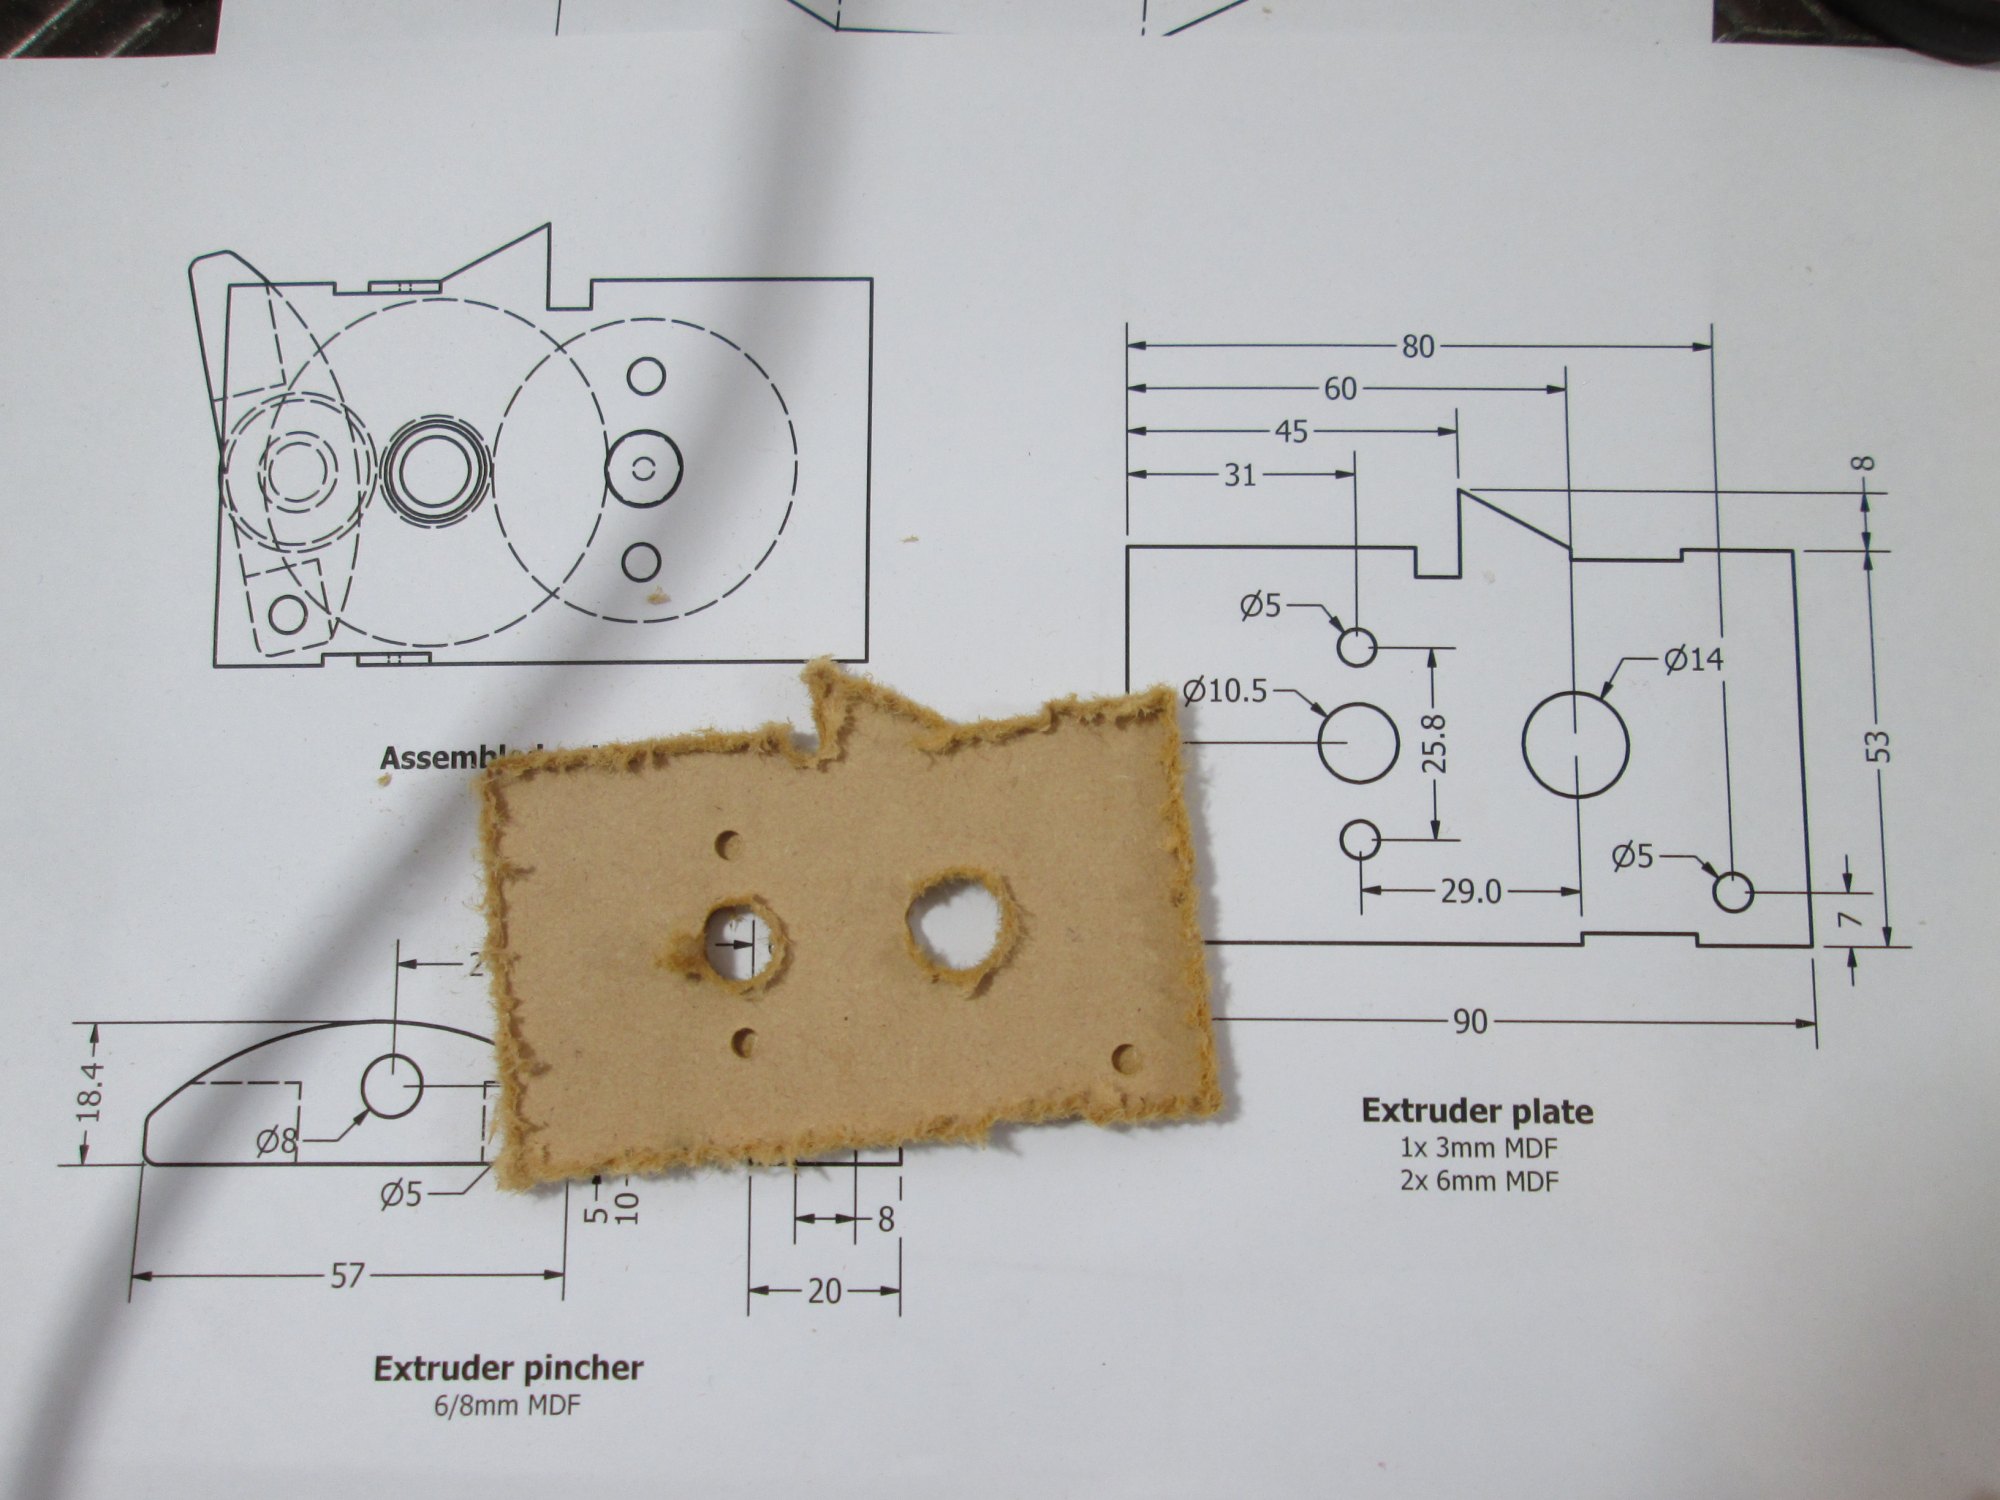
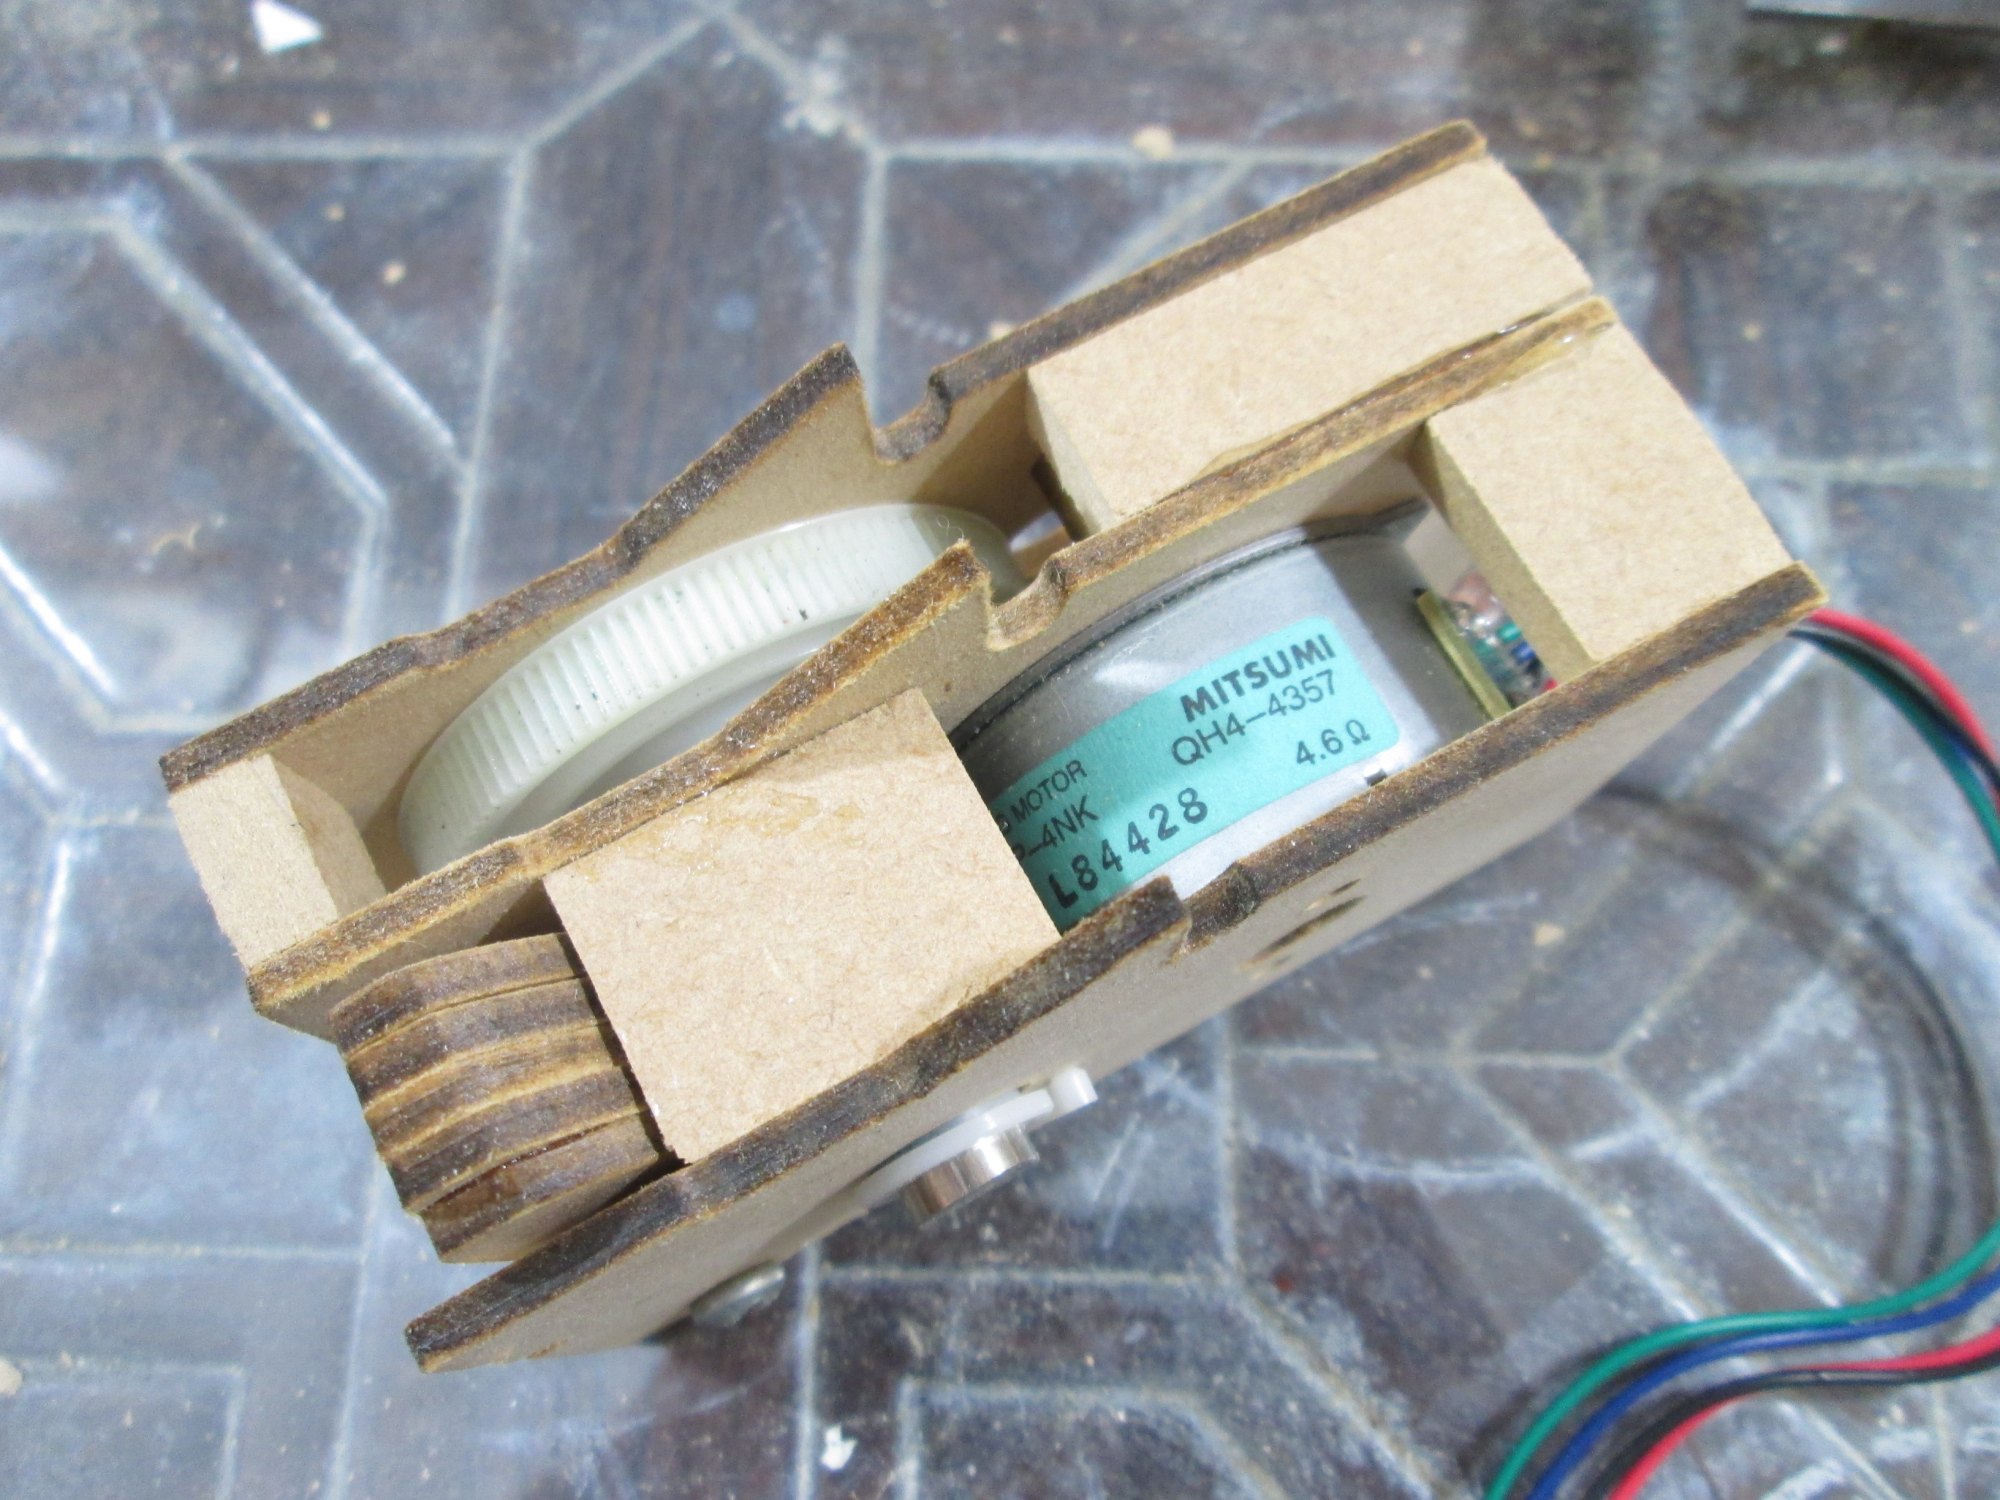
Happy with the 3D model I produced a set of plans and printed them out. The first bit I attacked was the extruder, which is responsible for pushing raw plastic filament into the "hot end". The hot end melts the plastic before it exits from a small nozzle and becomes part of the finished item.
An extruder's function is fairly simple; it needs to grip the filament and feed it at a controlled rate. To grip one needs to apply pressure, and have a knurled or grippy surface. The feed it, one needs a strong motor to push it into the melting chamber at a slow controllable speed. This usually implies a very strong motor, or a geared drive system.
While playing around, I discovered that I had all the parts I needed, thanks to one of the printers I'd dismantled. I had a strong stepper motor with a gear already attached, and a matching large nylon gear connected to the paper feed roller, which is coated in a dark stucco texture to better grip the paper.
I designed it all on the computer from some careful real-life measurements of the donor components. I produced some cutting template programs of the finished layers and milled them on my CNC machine. The raw, unsanded result:
After sanding and gluing together each layer, I was left with this:
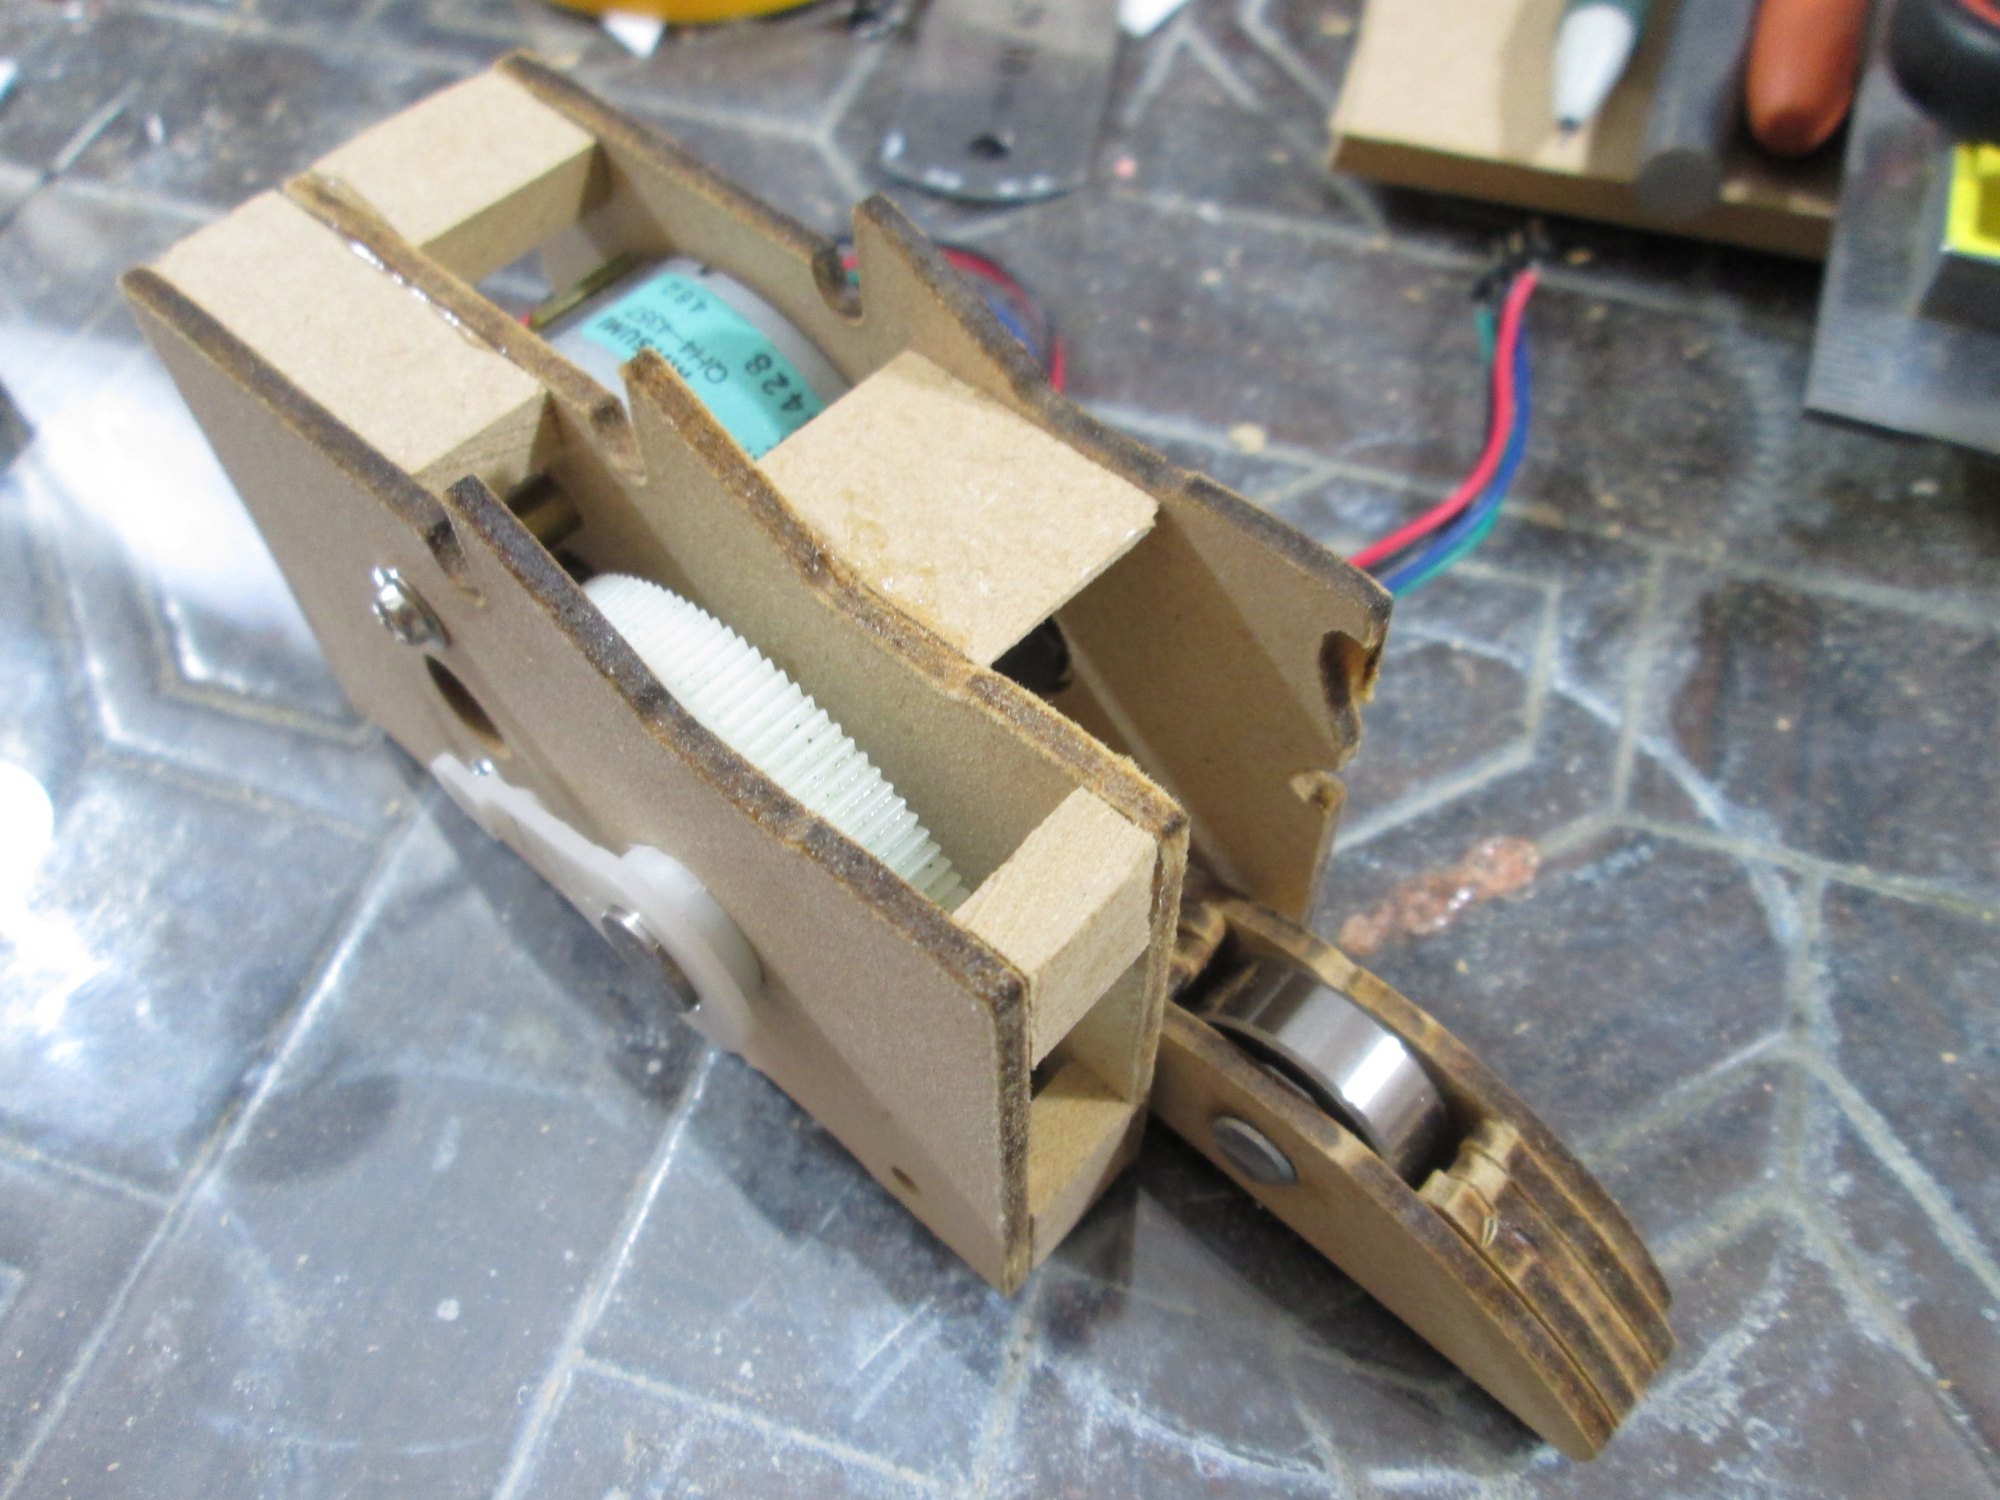
The stepper motor is at the rear. This drives a small gear which meshes with the larger gear, which turns the textured shaft. The fold out piece at right will be push the filament against the textured rod. It contains an idler pulley, made from a 608zz ball bearing. You can see the arrangement here:
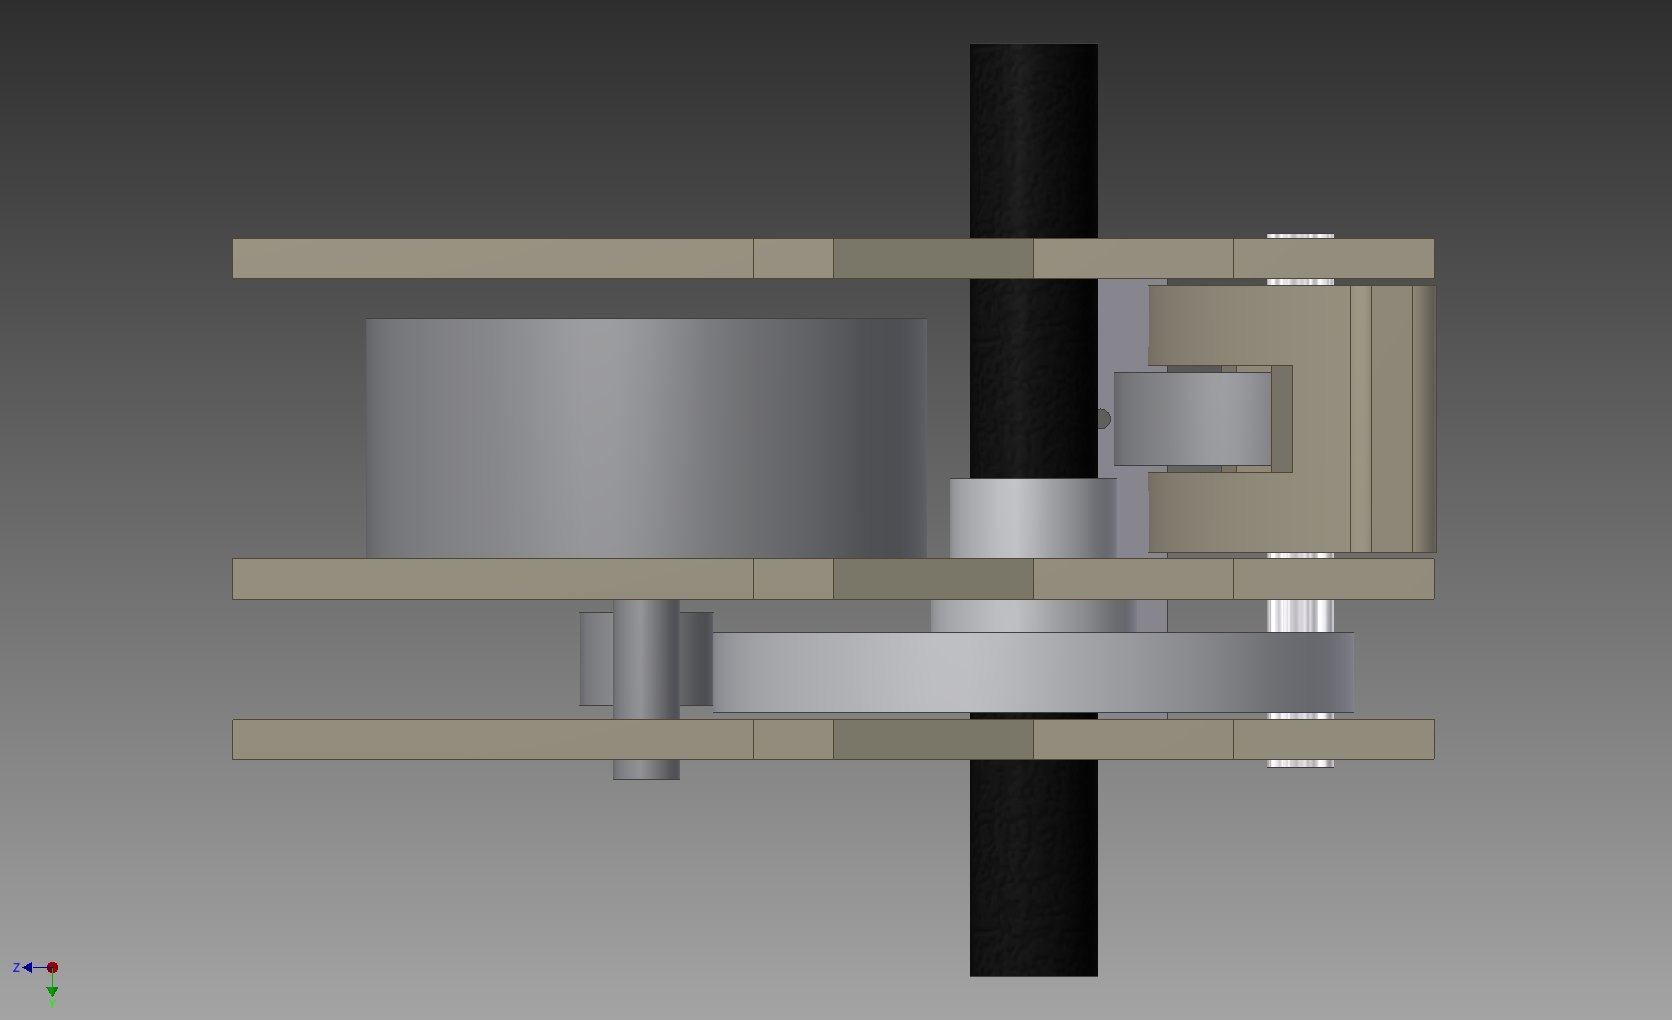
The whole thing went together very nicely, with all the holes in the right place, and the mounting standoffs on the motor helping hold everything together.
That's the extruder done pretty much done. Just need to add a couple of holes for the filament to go through. I've already started cutting out the remaining parts, but that can wait for another post.
Leave a comment?